

Note – Manufacturing trim size tolerance varies by component.
One of the automatic checks that occurs after clicking Approve to Print is a check of the component’s trim size against the supplied specification data.
Note – If specification data has been provided for your title, the automatic checks begin immediately. If specification data has not been provided, Lakeside Scout will automatically begin the checks once specifications are loaded.
Please ensure your CSR has the latest specification data for each component within your title. Doing so will help prevent production delays and questions.
One of three scenarios will occur during the component trim size check:
Scenario 1
When the trim size matches the supplied specification, the component will automatically check in, provided that the page count and number of colors also match the supplied specification. No further action is required for that component.
Scenario 2
When the trim size is within manufacturing tolerance of the supplied specification, a warning message will display on the component card.
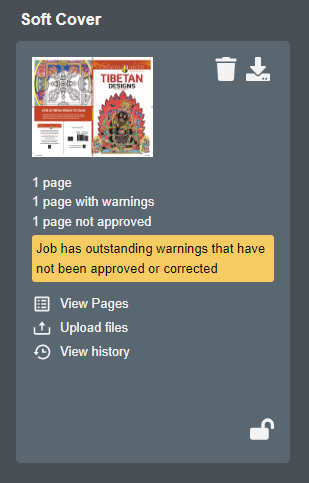
In this scenario, the warning can be addressed by one of the following:
Sign off on the page(s) since it is within the allowable manufacturing tolerance.
Supply a new file that matches the supplied specification (if applicable, double-check with your CSR to ensure your template is accurate).
Provide a revised specification to the CSR.
Use the Scale/Crop tool - instructions are found in this article
If the user chooses to sign off on the warning, they can do so by clicking the Sign off button on either the Preflight tab or in the Preflight Summary window.
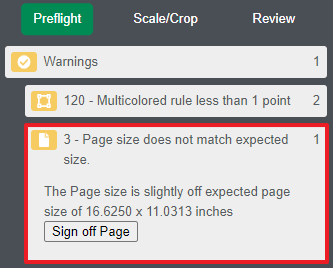
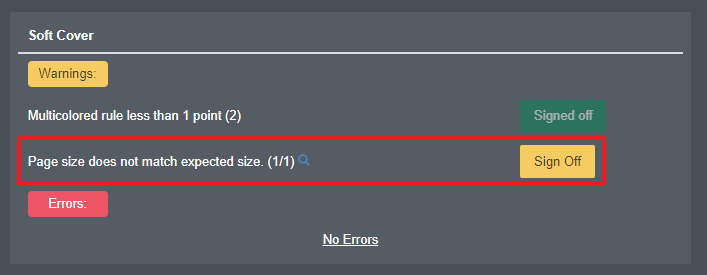
If the user chooses to Sign off or to use the Scale/Crop tool to resolve the issue, the user must approve the proof and Approve to Print to initiate the specification check again.
Scenario 3
When the trim size is outside manufacturing tolerance of the supplied specification, an error message will display on the component card.
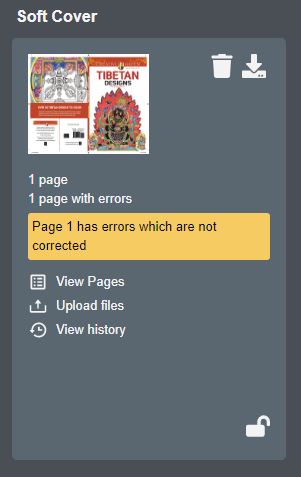
To determine where the trim discrepancy falls, open the page in proof mode. The supplied specification, (i.e., expected page size) is displayed on the Preflight tab under the Errors header.
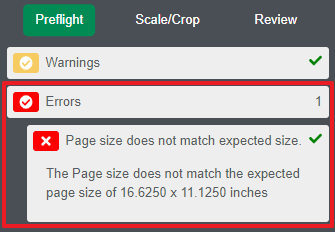
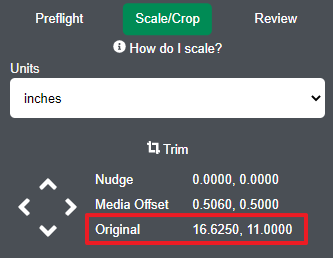
The original trim size in the supplied file is displayed on the Scale/Crop tab. In this example, the original trim height is 11.0 inches, while the supplied specification calls for 11.125 inches, resulting in a trim size error.
In this scenario, the error can be addressed by one of the following:
Supply a new file that matches the supplied specification (if applicable, double-check with your CSR to ensure your template is accurate).
Provide a revised specification to the CSR.
Use the Scale/Crop tool - instructions are found in this article
If the Scale/Crop tool is used to resolve the issue, the user must approve the proof and Approve to Print to initiate the specification check again.