A title must be checked out before it can be added or removed using the 'My Titles' filter.
When a user performs any of the following actions, the title is automatically added to their 'My Titles' list. However, users may also choose to manually add a title for management or production purposes, without taking these actions.
Note: You may need to refresh the browser page to see the newly added title in the 'My Titles' list.
Create title
Add/Delete component
Upload file
Approve/Reject page content
Approve to print
Assigned as a stakeholder (see this article for stakeholder details)
'My Titles' is a status filter that gives the user the option to add a specific title to their list of titles. This allows the user to see only the titles the user needs to take action on.
Adding a title to the 'My Titles' filter;
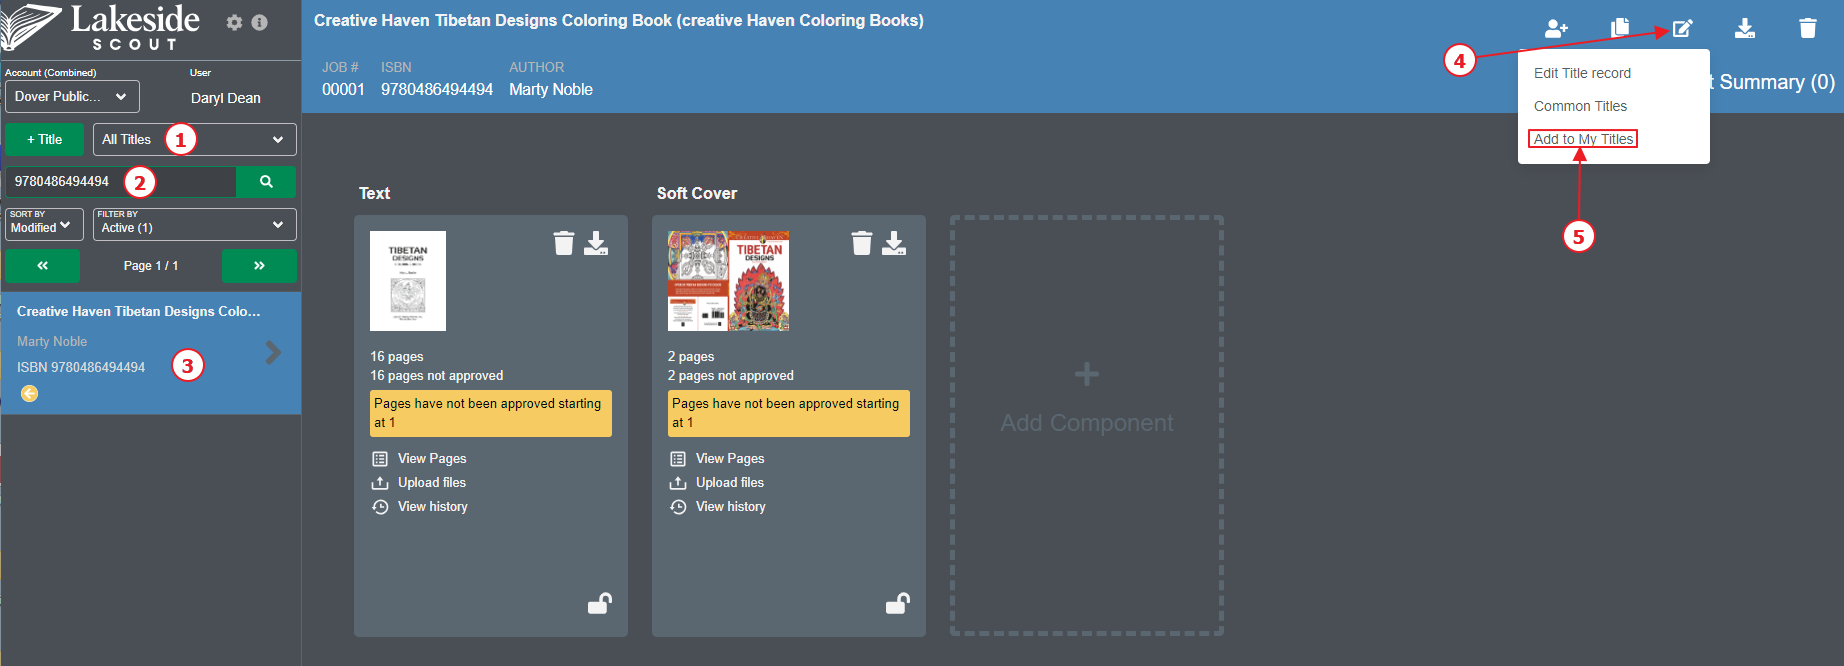
Ensure 'All Titles' is selected from the drop-down menu.
Search for the title by entering its ISBN, title or customer reference number.
Activate the title by clicking on its name.
Click the Edit title icon in the top-right corner.
Click 'Add to My Titles' from the drop-down menu. This allows the user to filter only those titles the user has added.
Removing a title from the 'My Titles' filter;
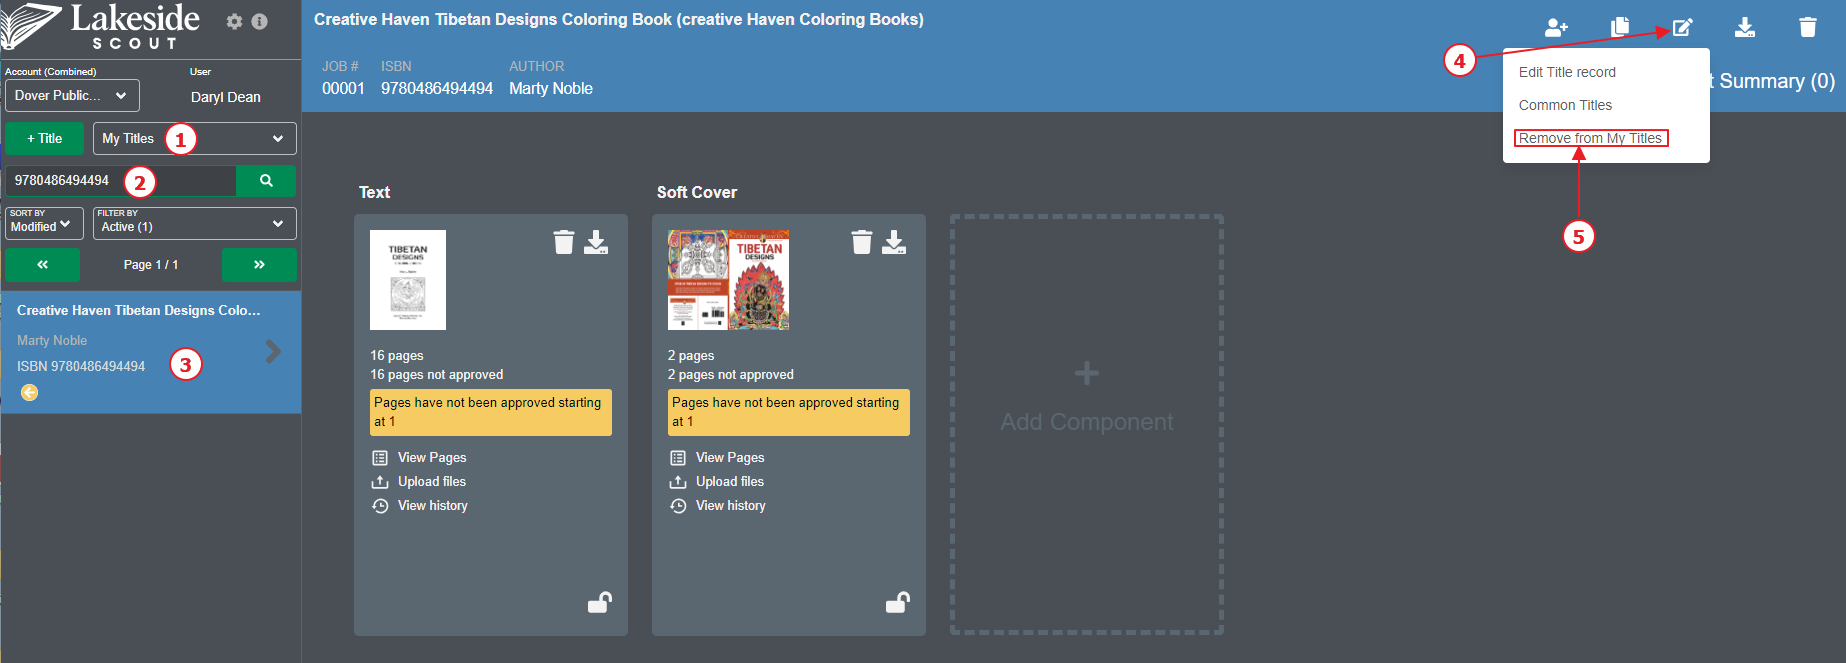
Ensure 'My Titles' is selected from the drop-down menu.
Search for the title by entering its ISBN, title or customer reference number.
Activate the title by clicking on its name.
Click the Edit title icon in the top-right corner.
Click 'Remove from My Titles' from the drop-down menu. This will remove that title from the users 'My Titles' filter.
For further information on how to use the 'My Titles' filter, see this article.